Using AWS Blockchain Templates for Hyperledger Fabric Development in Go (2)

I am a Software Engineer with a passion for Blockchain and Cloud DevOps.
Components and Frameworks
All the software to be used for Hyperledger Fabric Blockchain development is available in the AWS Elastic Container Registry (ECR) in Docker containers. The components on the network will run in containers, which will run on a single AWS EC2 Instance.
The peer, orderers, and endorsers will be provisioned in docker containers, and a PostgreSQL database ledger will be used in a separate docker container. Hyperledger Explorer will also run in a separate docker container that will allow you to monitor transactions and blocks on your blockchain network.
These containers are the components and frameworks that make up your Hyperledger Fabric blockchain on the AWS Cloud.
Docker Containers
Docker containers package source codes and dependencies in images. The image contains everything needed to host an application.
The AWS ECS is a fault-tolerant, scalable Docker container management service for managing container lifecycle. It has two launch types:
- AWS Fargate
- AWS EC2 Instance
Docker-compose will be used to create a multi-container application, having its configuration setting in a YAML file. AWS provides the YAML file, making setup easier.
Network Architecture on Hyperledger Fabric
The network architecture on the Hyperledger Fabric blockchain network is structured as follows:
- Set up a VPC on a single availability zone
- A public subnet will be set up
- An EC2 instance will be set up also, connected to the Security Groups via SSH
- The EC2 instance will access the containers that will contain the blockchain network resources
- In the EC2 Instance, Docker containers will host the peers, the orderers, the Explorer, and a PostgreSQL database ledger.
Creating a VPC
Create a VPC with a public subnet
Follow these steps to create a VPC with a public subnet:
- Navigate to the AWS home page on your browser. Click on Create an AWS Account if you do not already have one, or Sign in. AWS has a 12-month free tier access account you can use for the time being, so you can create a new account.
- Enable billing for your account as you will be billed for overusing the free privileges in the free tier access.
- Click on Services and search for VPC.
- Click on VPC > Launch VPC Wizard .
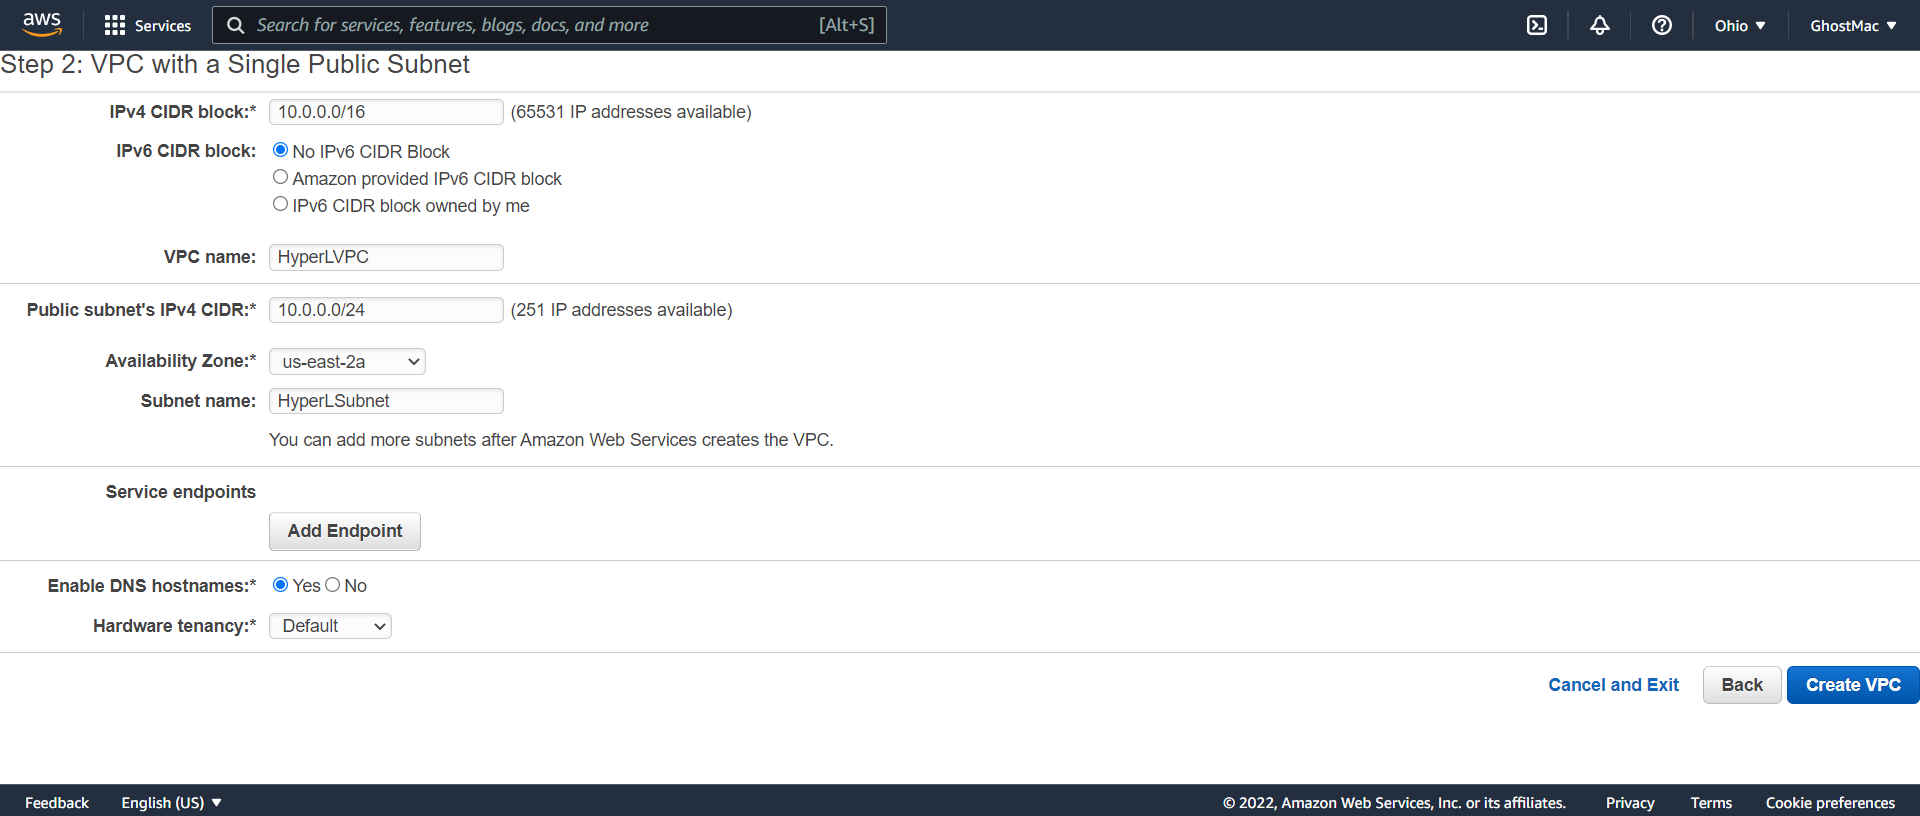
- Click on Select in the first option: VPC with a Single Public Subnet
- Leave the default settings on the first section on IP addresses, but at a VPC name of your choice. This article uses the VPC name: HyperLVPC.
- In selecting Availability Zone, keep in mind that AWS Blockchain Templates are only available in three zones: US East 1 in North Virginia, US East 2 in Ohio, and US West 2 in Oregon.
- Name the Subnet however you want. This article uses the Subnet name: HyperLSubnet.
- Click on Create VPC after completing these settings as seen below.
You will see a success message. Click on Your VPCs and you will see your VPC running.
Setting up key pair and Configuring Security Groups
Setting up a Public-Private key pair allows authentication of connections from your local machine to the EC2 Instance on AWS. Follow the steps below to set this up:
- Go back to the Services dashboard and search for EC2.
- Next, browse through the left navigation pane for the Key Pairs option under the Network & Security section. Select Key Pairs.
- Click on Create key pair at the top of the screen. Confirm that you are creating a Key Pair under the same region as your VPC.
- Name the key pair as you wish. This article uses the Key pair name: HyperNewKey.
- Leave the default settings once again and click on Create key pair below the screen.
The next window displays a Success message, along with your active key pair as seen below.

Copy and store the key safely as you will need it to authenticate yourself while connecting to the new Instance. Notice that it is downloaded in a .ppk file immediately after this window was displayed.
our key pair:
key-0a666d865fc023d4c
- Click on Security Groups on the navigation pane and under the Network & Security section.
- In the new window, click on Create security group at the top of the page. Security Groups in AWS are similar to Firewalls.
- Name the Security Group as you wish. This article uses the Security Group name: HyperFabSG.
- Next, add a description of your choice and click on the Create Security Group at the bottom of the page.

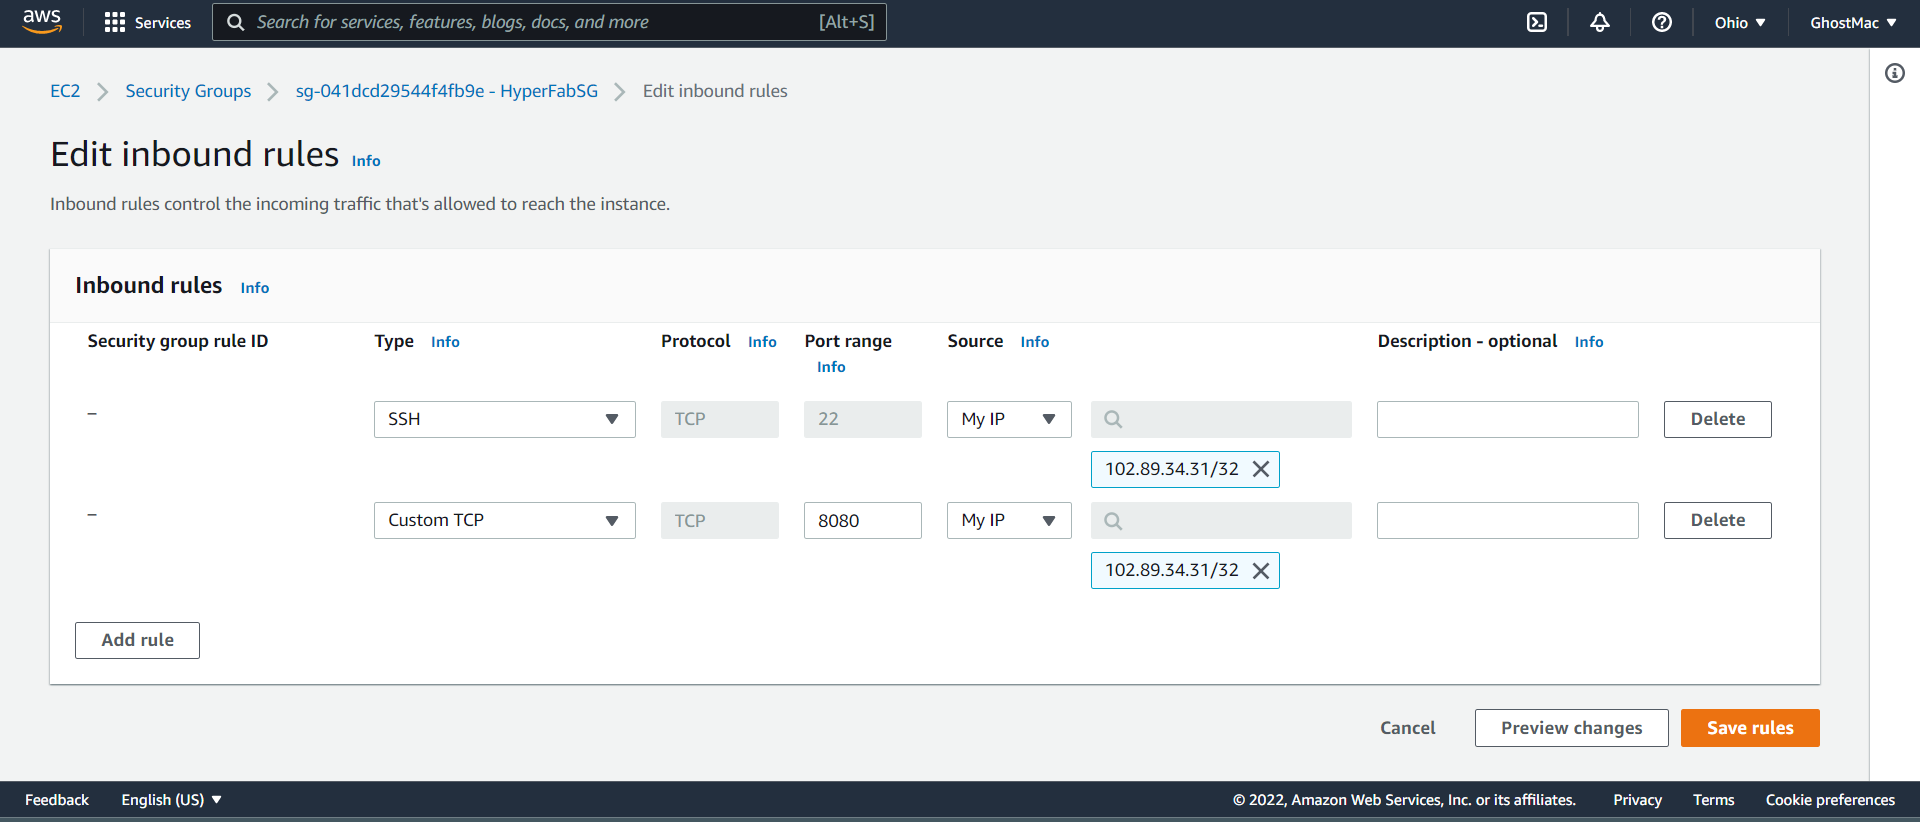
- Group rules can be created here in the Security Groups section. These rules control the traffic flow. To create a few rules, scroll down the current page displaying the Success message and click on the Edit Inbound Rules tab.
- On the new screen, click on the Type field displaying Custom TCP by default and select SSH. In the Source type field displaying Custom by default, select My IP.
- Click on Add rule to create a new rule with the following credentials: Type: Custom TCP, Source Type: My IP, Port Range: 8080.
- Click on Save rules now.
After the successful modification, new Policies and Roles will be created.
Creating Policies and Roles
The policies and roles will be created next. The roles are first created, then policies are attached to them.
This will require the AWS Identity and Access Management (IAM) service. Follow these steps below to set Roles and Policies on AWS IAM:
- In Services, search for IAM. After clicking on it, you should see the window display
- Click on Policies in the left navigation pane.
- Click on Create Policy, which should take you to a new window where you can create new policies with either a Visual editor or with JSON.
- Select whichever you wish and paste your new policy. This article uses JSON with the policy available here.
- Next, click on Next: Tags and click Next: Review.
- Finally, add the name of your Review Policy. This article uses the Review Policy name: EC2HyperFPolicy.
- Review the summary and click Create Policy.
Next, the roles that will manage these policies will be created.
- Click on Roles on the left navigation pane.
- Click on Create Role at the top of the page to create a new role.
- Select the EC2 instance in the Use Case section at the bottom of the page.
- Click Next and on the next window, select the policy you just created: EC2HyperFPolicy.
- Click on Next at the bottom of the page again, and specify a Role name as you wish. This article uses the Role name: EC2HyperFRole.
- Next, Click on Create Role.
- Click on View Role to see the summary of the newly created role. Copy the instance profile ARN (Amazon Resource Name) in the summary.
arn:aws:iam::428223012719:instance-profile/EC2HyperFRole
Creating the Hyperledger Fabric Network with AWS CloudFormation Stack
To create the Hyperledger Fabric, navigate to the AWS Blockchain Templates page and follow these steps:
- Click on the Get Started with AWS Managed Blockchain link.
- Navigate to AWS Blockchain Templates for Hyperledger Fabric.
- Select the Launch in US East (Ohio) region (us-east-2) which is the region for the subnet used in this article.
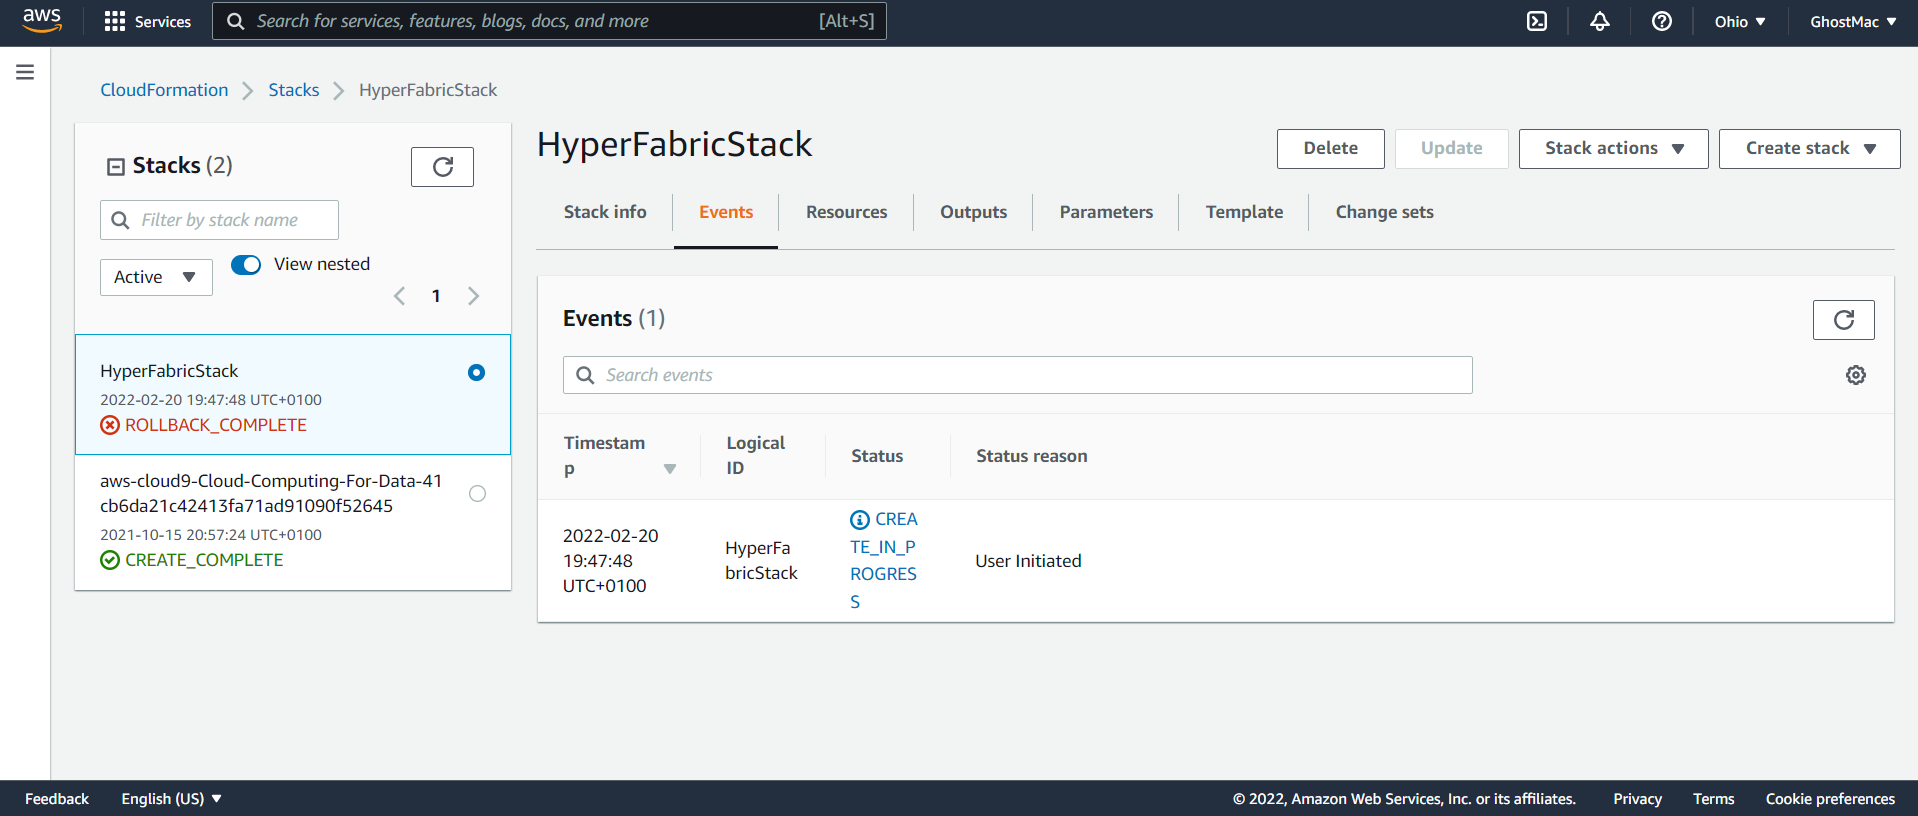
- It automatically launches the CloudFormation stack and displays the home screen to quickly create a stack on AWS and configure the Hyperledger Fabric network on a single Amazon EC2 instance.
- Create a new Stack Name with your preferred name. This article uses the Stack Name: HyperFabricStack.
- Next, specify your organization’s domain name in the Domain field. This article is a demo, hence, the default is used.
- Peer organizations are also available, should you have organizations to add.
- Scroll to the field for VPC ID, and select the VPC you created. HyperLVPC is selected for this article. Also, do the same for the VPC Subnet, EC2 Key Pair, Security Group, and paste the copied instance profile ARN.
- Select the Default for other settings.
- Click the two checkboxes under the Capabilities section and click the Create Stack button at the bottom of the page. The following page is displayed:
At this point, you have a complete Hyperledger Fabric blockchain network running on the AWS Cloud.
Conclusion
This article walked you through the process of creating your first Hyperledger Fabric Blockchain platform on the AWS Cloud.
The next article will also be technical as you will learn how to write a Chaincode in the Go programming language, and deploy it on AWS.
Being the final article in the series, you will put all you have learned into practice, and build your foundation as a Hyperledger Fabric Blockchain Developer.


